
The major difference between formatting for the web and PDF/Print is that PDF is paginated, content is placed on discrete pages. Prince allows you to control a number of options that affect how PDF formats pages, from straight-forward options such as page size, to decorations, headers and footers, numbering and page breaking options.
CSS properties that affect pages are specified within
page at-rules.
For example we can use the size property within the @page rule
to specify the page size
(see Page size).
@page {
    size: A4
}
In this section we will show most of the properties that can be specified within a page rule, then we will show how pagination can be controlled and how page styles can be applied to selected pages.
Most of the properties that can be applied to pages are straight forward and
will be discussed now.
Other properties require an understanding of Some @page selectors,
therefore we discuss them after that section.
These include page breaking (Page breaks) and
rotating wide content to fit on a page, and use of the :blank
selector (Advanced paged media examples).
Page size can be specified using the
size property in length units or by
a page size keyword (see Page Size Keywords for a list)
optionally combined with the portrait or landscape
keyword.
/* Use A4 paper */
@page { size: A4 }

/* Use A4 paper in landscape orientation */
@page { size: A4 landscape }

/* These two custom sizes are equivalent */
@page { size: 30cm 40cm }
@page { size: 40cm 30cm landscape }

/* Use square paper, this sets width and height */
@page { size: 30cm }
Sometimes it can be useful to specify the page dimensions in pixels, for example when creating presentation slides. (see Presentation slides).
@page { size: 1280px 960px }
Pages, like other block level elements, follow the CSS box model
introduced in CSS Box Model.
Their
padding
,
border
,
margins
and
background
can be styled within @page rules.
@page {
    margin: 2cm;
}
Prince also supports the margin-outside and
margin-inside properties.
These allow you to specify different margins for the inside and outside
edges of paper as it is bound into a book.
For example it may be necessary to have a larger inside margin
(sometimes called a gutter)
so that after some of the margin is used by the binding, the remaining
margins are even.
@page {
    margin: 2cm;
    margin-inside: 3cm;
}
This is used in Fancy headers

When typesetting a magazine or flyer it can be useful to print right to the edge of the paper. However most printers will refuse do do this. It is better to print on larger stock and then crop the paper to the correct size. If you use the marks property prince will create bleed and trim areas around your content (and declared page size). This can be seen in our catalogue example. This example has been adapted from the Catalogue sample in the Prince samples repository.
@page{
    size: 8.5in 10.5in;
    margin: 0;
    background: url("images/CatalogueCover.jpg");
    background-position: center;
    background-size: 104%;
    background-repeat: no-repeat;
    marks: crop cross;
    prince-bleed: 0.25in;
    prince-trim: 0.25in;
}
This example uses some of the properties that we introduced above,
plus three new ones:
marks,
prince-bleed and
prince-trim.
These options enable crop and cross marks and specify bleed and trim areas.
Note that size of the content does not change when we add these options,
the page is still 8.5in by 10.5in as specified by the
size property.
Instead 0.25in of bleed area and 0.25in of trim area has been added to each
edge (1in total).
Therefore we will need to print on 9.5in by 11.5in paper.
Prince will print solid background colours and repeating pictures into the
bleed area.
In this example we set the background size to 104% so that it would print
into the bleed area.
Prince also allows the placement and length of the crop marks to be specified with the prince-mark-offset and prince-mark-length properties.
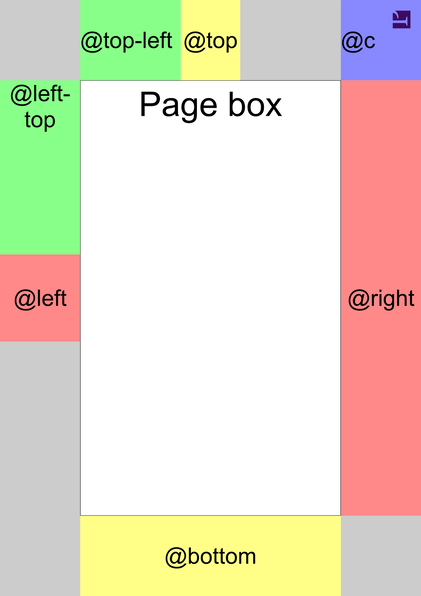
Most content appears inside the page box of one or more
pages.
Surrounding the page box, within the margin area, are the
margin boxes.
Figure
Margin boxes
shows the positions of some
margin boxes.
In this figure the @page background is a
grey
and body's background is
white.
The first four margin boxes:
@top,
@bottom,
@left and
@right are easy to understand and are shown in
yellow
and red.
Each of these margin boxes has a synonym ending in -center,
for instance @top-center is the same as @top.
You can place content in a margin box with the content
property.
For example you can print the current page number at the bottom of each
page (see Generated Content):
@page {
    @bottom {
        content: counter(page)
    }
}
Novel title page example and Textbook page numbers example show examples of headers and footers.
| Name | Default alignment | In figure | |
|---|---|---|---|
| text-align | vertical-align | ||
@top |
center | middle | yellow |
@bottom |
center | middle | yellow |
@left |
center | middle | red |
@right |
center | middle | red |
@top-left |
left | middle | green |
@top-right |
right | middle | not shown |
@bottom-left |
left | middle | not shown, |
@bottom-right |
right | middle | not shown |
@left-top |
center | top | green |
@left-bottom |
center | bottom | not shown |
@right-top |
center | top | not shown |
@right-bottom |
center | bottom | not shown |
@top-left-corner |
right | middle | not shown |
@top-right-corner |
left | middle | blue |
@bottom-left-corner |
right | middle | not shown |
@bottom-right-corner |
left | middle | not shown |
Several other margin boxes can also be used.
All the margin boxes are shown in Margin boxes.
Prince will try to create margin boxes of the correct sizes,
If you need to create boxes of specific sizes you may need to use only a
single box (eg: @top) and use the content
property to place elements with specific sizes in it
(Broken link).
Note that in
Margin boxes
that prince leaves space for
@top-right and @left-bottom boxes because their
counterparts (@top-left and @left-top respectively)
have been defined.
This keeps the @top and @left centered along the
top and side of the page respectively.
Many CSS properties can be applied to margin boxes:
All of the margin, padding, border and background properties can be used to style margin boxes.
The vertical-align property can be applied to any margin box to vertically align its content.
When a margin box contains generated content, many inline style properties such as color and font can be applied to style the generated content.
We have already shown an example of using the page counter to
print the page number at the bottom of each page,
this is one example of generated content.
The page counter is predefined and starts at 1;
it increments automatically for each new page.
(Note that the page counter cannot be incremented manually using the
counter-increment property.
The page counter can be reset using the
counter-reset property at any block-level element within
a non-floating element in the normal flow.
This is useful for restarting page numbering at a new section of the
document.
<body>
    <div class="front"> cover page, etc, ... </div>
    <div class="contents">
        table of contents, ...
    </div>
    <div class="body">
    <div class="chapter"> chapter 1...</div>
    <div class="chapter"> chapter 2...</div>
    </div>
    <div class=appendix"> appendix1 </div>
    <div class=appendix"> appendix2, ... </div>
</body>
.contents {
    display: block;
    page: table-of-contents;
    counter-reset: page 1
}
@page table-of-contents {
    @top { content: "Table of Contents" }
    @bottom {
        content: counter(page, lower-alpha)
    }
}

.body {
    display: block;
    page: main;
    counter-reset: page 1
}
@page main {
    @top { content: string(chapter-title) }
    @bottom {
        content: counter(page)
    }
}

.chapter h1 { string-set: chapter-title content() }
Restarting page numbering also uses Named pages which we will explain in more detail below. We create three types of pages: table-of-contents pages, main pages, and pages without a name.
The .contents rule names the pages that it
appears on as table-of-contents and resets the page counter to
1 at the start of the contents div.
Then the @page rule for those pages generates a page footer
that contains the current page number in lower-alpha style.
This rule also sets the page header to the string "Table of Contents".
The .body rule names the pages that it appears on as
main and resets the page counter to 1 at the start of main div.
Then the @page rule for the main pages generates a
page footer that contains the current page number in the default decimal
style.
This rule, together with the .chapter h1 rule,
sets the page header to the title of the chapter
(see Generated Content).
Pages that don't match either of these names have the default style, which does not include a page number in the footer.
In some documents,
particularly those that are unbound such as office documents,
it can be useful to show the total number of pages on each page.
The total number of pages can be accessed using the pages
counter.
This is a pre-defined counter that is fixed to the total number of pages in
the document.
@page {
    @bottom {
        content: "Page " counter(page) " of " counter(pages)
    }
}
This rule will generate page footers such as "Page 1 of 89".
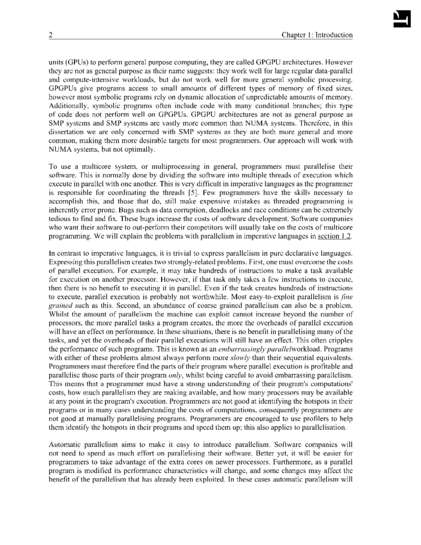 This example shows a header as might be found in a textbook.
The
HTML and
PDF
are both available.
This is a small part of a larger example in our
Prince samples repository.
This example shows a header as might be found in a textbook.
The
HTML and
PDF
are both available.
This is a small part of a larger example in our
Prince samples repository.
This example demonstrates a more complete headers style. It uses generated content to print page numbers, the chapter number and title and the section number and title using different styles for left and right pages. It also prints an underline under the header, See Fancy header example .
@page {
    font-family: Times, Serif;
    font-size: 11pt;
    text-align: justify;
    margin-top: 2cm;
    margin-bottom: 2cm;
    margin-inside: 3.5cm;
    margin-outside: 2.5cm;
}

@page body:left {
    @top-left {
        content: counter(page);
        vertical-align: bottom;
    }
    @top-right {
        content: "Chapter " counter(chapter) ": " string(chapter);
        vertical-align: bottom;
    }
}
@page body:right {
    @top-right {
        content: counter(page);
        vertical-align: bottom;
    }
    @top-left {
        content: counter(chapter) "." counter(section) " "
            string(section);
        vertical-align: bottom;
    }
}
@page body {
    border-top: thin black solid;
}
@page body:first {
    margin-top: 25%;
    @top-left { content: normal; }
    @top-right { content: normal; }
    border: none;
}
@page body:blank {
    @top-left { content: normal; }
    @top-right { content: normal; }
    border: none;
}
body {
    font-family: Times, Serif;
    font-size: 11pt;
    text-align: justify;
    padding: 0.5cm 0cm;
}

div.body {
    page: body;
}

div.body h1 {
    page-break-before: right;
    prince-page-group: start;
    string-set: chapter content();
    counter-increment: chapter;
    counter-reset: section;
}
div.body h1::before {
    content: "Chapter " counter(chapter) ": ";
}

div.body h2 {
    string-set: section content();
    counter-increment: section;
}
div.body h2::before {
    content: counter(chapter) "." counter(section) " ";
}
The main content area is 2.5cm from the page's edge on all sides.
On the left and right this is a margin of 2.5cm and on the top and bottom
it's 2cm of margin and 0.5cm of padding.
This places the bottom border of the
@top margin box 0.5cm from the main content area, enough to
avoid making it look crouded.
The header text has the vertical-align: bottom property to
ensure that it appears immediately above the border — the border
is made to look like an underline.
This example uses many properties and page selectors discussed later in
this section.
This is a small part of a larger example in our
Prince samples repository.
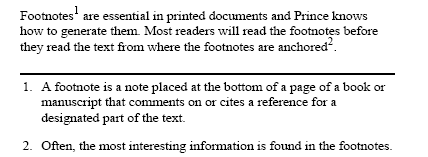
Prince supports footnotes using the float property. If an element has the property float: footnote then it will be floated into the footnote area of the page and a reference will be placed in the text.
This example shows some simple footnotes, the fn class is used to create footnotes:
<style>
.fn {
    float: footnote
}
</style>

...

<p>
Footnotes<span class="fn">A footnote is a note placed at
the bottom of a page of a book or manuscript that comments on or
cites a reference for a designated part of the text.</span>
are essential in printed documents and Prince knows how to generate
them. Most readers will read the footnotes before they read the text
from where the footnotes are anchored<span class="fn">Often,
the most interesting information is found in the footnotes.</span>.
</p>
Each footnote implicitly increments the footnote counter which is used to number the footnotes. The footnote counter can be reset at each new page, section or chapter as necessary. This example resets the counter on each new page.
@page {
    counter-reset: footnote
}
Footnote calls are the numeric anchors in the text that refer to the
footnotes.
Prince will generate footnote calls using the ::footnote-call
pseudo-element.
This is the default style for footnote calls:
*::footnote-call {
    content: counter(footnote);
    font-size: 83%;
    vertical-align: super;
    line-height: none
}
This will display the current value of the footnote counter in a superscript position in a slightly smaller font than the main text. The line-height declaration ensures that the superscript position of the footnote does not affect the line height of the main text.
The footnote call style can be customised to use different fonts or colors. It can even be customised to include different content, such as placing the footnote counter in brackets rather than making it superscript.
*::footnote-call {
    content: "[" counter(footnote) "]"
    font-size: inherit:
    vertical-align: inherit;
}
This rule will generate footnote calls with the number of the footnote in brackets, like this: [1], [2], [3].
Prince automatically generates footnote markers, the numeric markers placed
in front of the footnote text.
Footnote markers are similar to the markers added to
list items (see Lists)
in most respects, and can be styled in a similar fashion
using the ::footnote-marker pseudo-element:
*::footnote-marker {
    font-weight: bold
}
This rule will generate footnote markers with a bold font.
Footnote markers are rendered outside the footnote in the left margin area by default. If the CSS property footnote-style-position has value inside, the marker is rendered as the first inline box inside the footnote. (This property is similar to the list-style-position property that applies to list markers (see Lists).
Footnotes are placed within the @footnotes area of the
page, which can be styled within @page rules.
Note that if there are no footnotes on a page then the footnotes area
will not be displayed on that page at all.
@page {
    @footnotes {
        border-top: solid black thin;
        padding-top: 8pt
    }
}
This rule adds a border and some padding to the top of the footnotes area.
@page selectorsIt is often necessary to apply styles to some pages, but not others. Either applying them to only some pages, or on every page except selected pages. CSS and Prince provide a number of page selectors for choosing which pages a rule applies to.
:first, :Nth,
:left and :right page selectors
We discuss the :blank page selector in
The :blank page selector below.
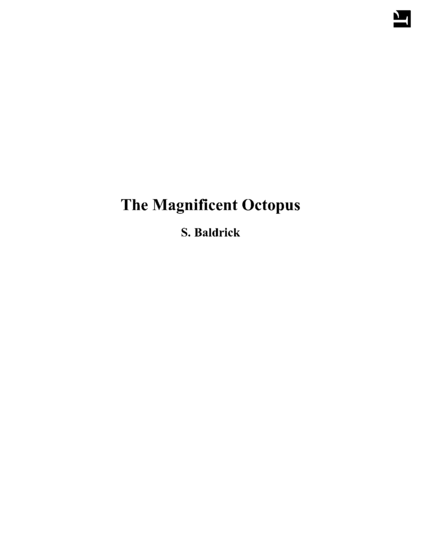
In a novel it is useful to print a page number at the bottom of every page,
except for some pages such as the title page.
In this example the @page rule is applied to all pages.
Then the @page:first rule,
which is more specific,
removes the footer from the first page.
See Page headers and footers and Generated Content.
  <html>
<head>
<style>
@page {
    @bottom {
        content: counter(page)
    }
}
@page:first {
    margin-top: 10cm;
    @bottom {
        content: normal
    }
}
h1, h2.subtitle {
    text-align: center
}
h2.chaptertitle {
    page-break-before: always
}
</style>
</head>
<body>

<h1>The Magnificent Octopus</h1>
<h2 class="subtitle">S. Baldrick</h2>

<h2 class="chaptertitle">Chapter 1</h2>
<p>Once upon a time there lived a little saussage.</p>

</body>
</html>
In this example the @page rule specifies styles that apply to
all pages:
Then the @page:first rule overrides this for the first page
only.
It resets the content property for the footer and
increases the top margin,
printing the title of the novel in a reasonable place on the page
(see Page style).
This example also uses the
page-break-before property to force a page break
(see Page breaks).

When using the :first page selector to choose the first page
in each chapter (such as in Fancy headers) it may be
necessary to add
prince-page-group: start
to the first element in each chapter (such as h1).
See Page groups.
The :left and :right page
selectors can be used to style left and right pages in a bound book
differently.
This is often used in text books to place the page number on the outside
top corners of pages.
@page:left {
    @top-left { content: counter(page) }
    @top-right { content: string(book-title) }
    margin-left: 2cm;
    margin-right: 3cm;
}
@page:right {
    @top-left { content: string(chapter-title) }
    @top-right { content: counter(page) }
    margin-left: 3cm;
    margin-right: 2cm;
}

h1 { string-set: book-title content() }
h2 { string-set: chapter-title content() }
These rules also place the book title in the header of left pages,
and the current chapter's title in the header of right-facing pages.
The book title is copied from the text content of the
h1 element while the chapter title is copied from the
text content of the h2 elements
(see Generated Content).
They also specify wider margins in the gutter of the
page spread;
binders may need this extra width for a book's binding.
The first page in a document using the default left-to-right reading order is a right page. Imagine the cover or a title page of a book which appear on a right page. The first page of a right-to-left document is a left page.
Prince does not currently allow you to change this behaviour. This will be added in Prince 11.
Sometimes it can be useful to select the Nth page in a
document.
The :nth( page selector can be
used to do this:
@page:nth(42) {
    ...
}
Sometimes it is necessary to style pages depending on their content; named pages allow us to select pages that contain particular elements. We used this in Restarting page numbering, to apply a style to the table of contents pages to print their page numbers using roman numerals.
The element containing the table of contents has a page property applied, specifying that this element's pages are table-of-contents pages. The page property may be applied to any block-level element within a non-floating environment in the normal flow.
Then using this page name to apply a different @page rule to
the table-of-contents pages:
@page table-of-contents {
    @top { content: "Table of Contents" }
    @bottom {
        content: counter(page, lower-alpha)
    }
}
More than one element can belong to the same name, in other words, page names behave like CSS classes.
Prince will create a page break between elements belonging to different named pages, including elements without a named page. So in Restarting page numbering, a page break will be inserted after the the table of contents, because the next element has the page name main rather than table-of-contents.
Selectors such as :first,
:, :left and
:right also work with named pages. For example:
@page preface {
    @bottom {
        content: counter(page, lower-alpha)
    }
}
@page preface:first {
    @bottom {
        content: normal;
    }
}
This example only works when a page name is used only once within a document, such as for the preface of a document (documents only have one preface). If you wish to apply a style to the first page of every chapter then you must use the prince-page-group property to create page groups:
div.chapter {
    page: chapter;
    page-break-before: right;
    prince-page-group: start;
}
@page chapter {
    @bottom {
        content: counter(page);
    }
}
@page chapter:first {
    @bottom {
        content: normal;
    }
}
prince-page-group: start instructs Prince to
start a new page group.
This is necessary for the div.chapter:first selector to match
the first page of each chapter, instead of only the first page in the first
chapter.
See Page groups.
Prince will create page breaks automatically when new content will not fit on a page. Sometimes it is useful or necessary to control where page breaks should and should not be used. There are two ways to do this, and both are useful in different circumstances: page breaks can be added or prohibited with the Page breaks properties, and the how to control where within a paragraph a page break may occur with Widows and orphans properties.
The simplest case is when you want to explicitly create a page break. This is typically used at the beginning of a chapter, to start the new chapter on a new page.
h1 {
    page-break-before: always
}
page-break-before
is used to force a page break immediately before an
h1 element,
New chapters are often started on the recto
pages in text books, this is usually the right page:
h1 {
    page-break-before: right
}
Other values are
auto,
avoid
and left.
The property page-break-after may also be used to force a page break after an element,
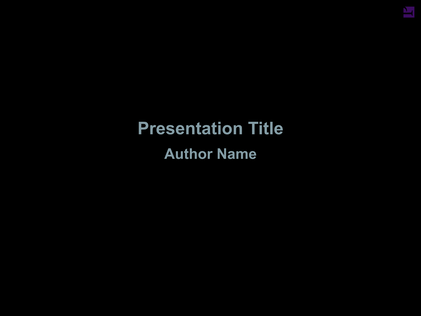
It is necessary to force a page break when creating overhead slides.
This can be done by placing the content for each slide in a
<div class="slide"> and using
page-break-before: always as shown below.
This example shows other styling that may be required to create presentation
slides.
@page {
size: 1280px 960px;
@bottom-left {
content: "Presentation Title";
}
@bottom-right {
content: counter(page);
}
background: black;
color: white;
font-family: DejaVu Sans, sans-serif;
font-size: 16pt;
margin: 96px;
}
@page:first {
@bottom-left { content: normal }
@bottom-right { content: normal }
}
div.centerpage {
/*
* Cause the content on these pages to begin part-way through
* the page. This is useful for a title page.
*/
margin-top: 33%;
}
body {
font-size: 28pt;
font-family: DejaVu Sans, sans-serif;
color: white;
}
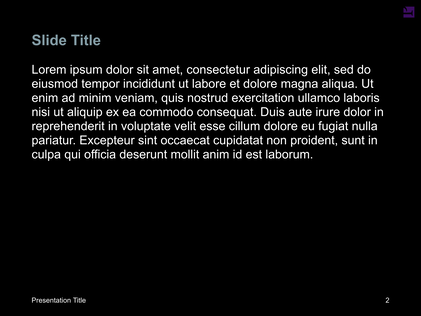
div.slide {
page-break-before: always;
}
<div class="slide">
  <h2>Slide Title</h2>

  <p>
    Lorem ipsum dolor sit amet, consectetur adipiscing elit, sed do
    eiusmod tempor incididunt ut labore et dolore magna aliqua. Ut enim
    ad minim veniam, quis nostrud exercitation ullamco laboris nisi ut
    aliquip ex ea commodo consequat. Duis aute irure dolor in
    reprehenderit in voluptate velit esse cillum dolore eu fugiat nulla
    pariatur. Excepteur sint occaecat cupidatat non proident, sunt in
    culpa qui officia deserunt mollit anim id est laborum.
  </p>
</div>
The font-family and color properties are
specified both in the @page and body rules, even
though they're the same.
This is required because the margin boxes are outside of the
body and must be styled separately, likewise the content within
body cannot be styled by the @page rule.
A rendered slide for this example is shown in Presentation slides example . The example has been adapted from slides (HTML+CSS) for a presentation about the Mercury programming language. This is part of our samples repository. You are encouraged to use samples from the repository and contribute your own.
So far we have discussed forcing a page break, however suppressing page breaks is also important. For example, it is poor style to have a page break between a header and the first paragraph of a section. Therefore, the default Prince stylesheet will use the page-break-after property to suppress page breaks immediately after headers:
h1, h2, h3, h4, h5, h6 {
    page-break-after: avoid
}
If a heading occurs at the bottom of a page, it may be moved to the next page to keep it with the content that follows it, usually a paragraph.
Avoiding page breaks within an element is also important. For example, it is best to avoid breaks within a figure or table. This can be done with the page-break-inside property:
.figure, table {
    page-break-inside: avoid
}
If the figure or table would have been split across two pages, it may be moved to the next page to keep it in one piece. An element longer than one page will still need to be split across multiple pages.
Note that the page-break-inside property cannot be used
to create page breaks;
its only valid values are auto and avoid.
These three properties can be applied to block-level elements, table rows and table row groups that occur within an in-flow element (ie. inside the normal flow of the document, not inside a float or an absolutely positioned block). Therefore the figure and table example only make sense when the figure or table is not floated.
Page breaks have similarities with column breaks, see Broken link.
Just as breaking a page between a heading and the first paragraph below the heading can look bad, breaking the page after only one or two lines of a paragraph also looks bad. These stray lines are called orphans. The minimum number of orphans to allow can be specified with the orphans property (the default is 2).
p {
    orphans: 3
}
Likewise the minimum number of lines to move to a new page (widows) can be specified with the widows property (the default is 2).
p {
    widows: 3
}
It can be easy to confuse widows and orphans. However a mnemonic device can help: "An orphan is alone from the beginning [of the paragraph]; a widow is alone at the end [of the paragraph]". (Source Widows and orphans — Wikipedia).
:blank page selector
As we discussed in the previous section
page-break-before: right
can be used to place the first page of a chapter on the right page in a
spread.
If the previous page is a right page then two page breaks are inserted,
leaving a blank left page.
However, this page will have normal @page styles applied to it,
which is usually not what people want.
The :blank page selector can be used to change the style of
blank pages, pages skipped such as a left page before a
page-break-before: right,
including removing any content.
@page:left {
    @top-left {
        content: counter(page);
    }
}
@page:right {
    @top-right {
        content: counter(page);
    }
}

@page:blank {
    @top-left {
        content: normal;
    }
    @top-right {
        content: normal;
    }
}

h1 {
    page-break-before: right;
}
This example clears the generated content used on these pages.
This works because :blank is more specific than either
:left or :right.
The :blank page selector can also be used with named pages.
@page frontmatter {
    @bottom { content: counter(page, lower-roman); }
}

@page frontmatter:blank {
    @bottom { content: normal; }
}
Note that when used with named pages,
the blank page has the same name as the page following it.
For example when typesetting a book with frontmatter named
pages for the title page, table of contents etc,
and main named pages for the main content.
Will need the blank page (if one is produced) between the table of contents
and the first chapter to be typeset with @page main:blank page
selector.
If chapter 1 also resets page numbering, then the page numbers will be reset on the first content page (a non-blank page).
It is not always best to have no content on blank pages. Sometimes otherwise blank pages are required have some content, such as a notice saying "This page sententially left blank". For example in legal documents this prevents people from mistaking a dangerous printing error for an intentionally blank page.
When consecutive elements belong to the same named page
but logically separate structures (such as individual chapters)
Prince combines them into one page group.
This causes it to apply the :first page selector
to the first page of the whole page group only (the first page of chapter 1).
Instead we usually want :first applied to the first page of
each chapter.
This can happen either:
h1 which may have
page-break-before: right applied
(this can be seen in Fancy headers);
div.
Prince provides the prince-page-group property that can be used to start a new page group. It can be seen in Fancy headers applied to h1 elements in the body of the document.
div.body h1 {
    page-break-before: right;
    prince-page-group: start;
    ...
}
prince-page-group also forces a page break,
overriding any properties that attempt to avoid page breaks.
The more specific left and right page take
precedence over prince-page-group.
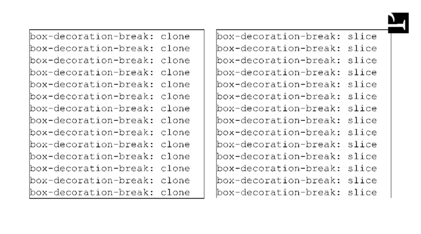
clone value is used while on the right
slice is used.
The
PDF
and
HTML
are available for download.
When a page (or column) break occurs within a box (such as a div) its bottom
and top borders are cloned so that they also appear at the bottom of the first section and the top of the second section of the box.
This is shown in the left of Box decoration break sample.
This is the default but may be set with the
box-decoration-break property, setting its value to
clone.
div.box1 {
    box-decoration-break: clone
}
If instead you wish the borders to remain open, as if the box were simply
sliced in half,
as in the right of Box decoration break sample,
then you can set this property to slice.
div.box2 {
    box-decoration-break: slice
}
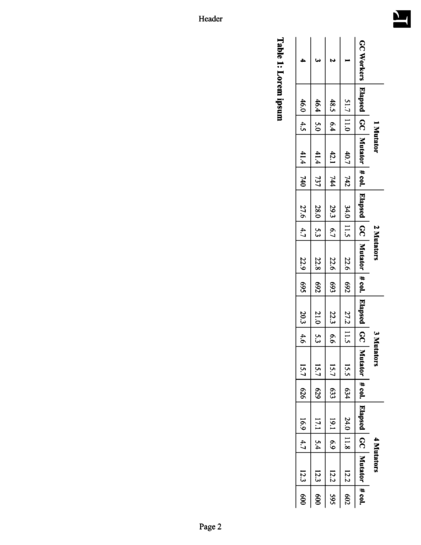
Sometimes it is necessary to rotate a block element so that it fits on the page. This is common with tables. Figure Printing a big table sideways shows a table, rotated so that its width fits within the page's length. This can be acheived with the following rules:
@page big_table {
    prince-rotate-body: landscape
    prince-shrink-to-fit: auto;
}

table.big {
    page: big_table
}
The prince-rotate-body property works within
@page rules only,
so this example uses a named page to place the table on a page of its own.
Then the @page rule for big_table pages
uses the prince-rotate-body property to tell prince that
the body of the page, but not the headers and footers, should be rotated.
The table in this example is still too wide so we also use the
prince-shrink-to-fit property to make it a little
smaller.
If you download the full example (HTML or PDF) you will see that the paragraphs before and after the table are not placed on the same page. This is because they do not belong to the same named page (see Named pages). However on page four there are two tables, both tables belong to the same named page and therefore Prince will try to place them together on the same page.