Let's get started with Prince. We will download and install the software and use it to generate a PDF from a very simple document with a very basic stylesheet. This chapter will get you up and running with Prince as quickly as possible.
Readers should already be familiar with HTML and CSS - many good tutorials are available on the topic. Familiarity with your computer's command line interface is desirable but not essential. Because the chapter is aimed at getting started as quickly as possible we may skip some explanations, don't worry as these will be covered later in the manual.
If Prince is already installed, you can directly skip to the User Guide.
Prince is available for Windows, MacOS X, Linux (multiple distributions) and FreeBSD. You can download the relevant file from our downloads page. For Linux and FreeBSD you may need to choose based on your distribution type, version and processor type (32/64 bits).
Prince is provided under the terms of the Prince End-User License Agreement.
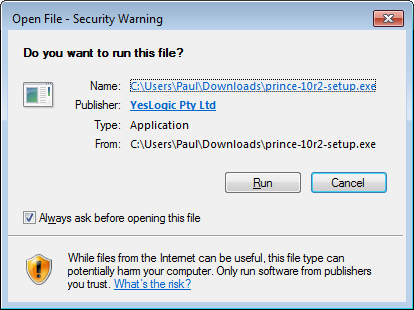
After downloading and attempting to run the installer you might see a confirmation screen like this. Click "run". Note that the filename for the installer may be different than the one shown in the picture.
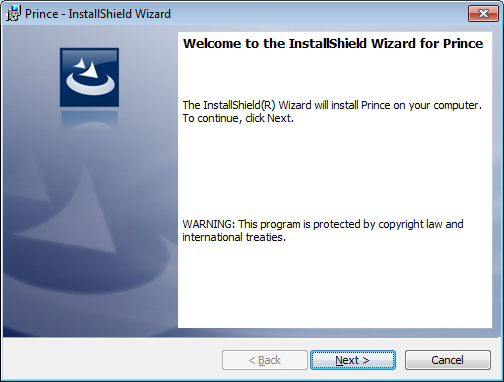
The installer will display a welcome screen like the one below. Click next.
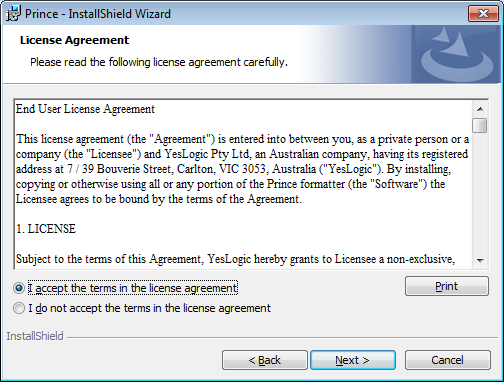
Next you will need to accept the license agreement. The text of the license agreement is also available here. Accept the agreement and click Next.
Choose the installation directory for Prince.
The default is recommended unless you have a specific reason to install
Prince elsewhere.
When using Prince from the command line we will use the executable in the
Engine\bin\ subdirectory.
The installation requires only 16MB of disk space.
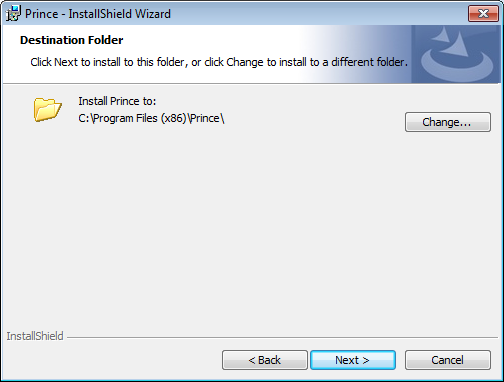
The installation will confirm the installation details with you before performing the installation. Click Next to continue.
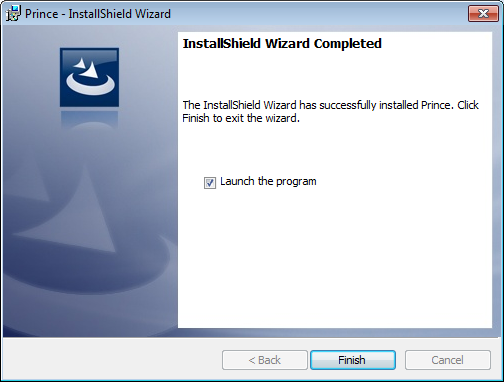
After the installation has completed you have the option to launch the Prince graphical user interface (GUI). The Prince graphical user interface is only available for Microsoft Windows. Your First Document provides more information about how to use both the GUI and the command line interfaces. Click Finish to close the installer.
To run Prince on Windows, you typically double-click on the Prince icon created during installation. You can also run only the binary, without the GUI, like on all other systems - for details please see the Command-line Reference.
For the layout of a Prince installation on Windows, see the Windows installation layout section.
For information about using Prince from PHP, Java, .NET, and other server frameworks you will need to install one or more Prince wrappers. See Server Integration for installation and usage information.
To install Prince on MacOS X, please run the install.sh shell
script contained in the package downloaded to your computer from the
download page. This will involve the following
procedure:
$ cd download_directory
$ tar xvf prince-package-macosx.tar.gz
$ cd prince-package-macosx$ ./install.sh/usr/local, which is the default value. This can be
accomplished by running the installation script using sudo,
which will prompt you for your password:
$ sudo ./install.sh
Password: .....
If you chose a non-standard location you may need to add the
bin/ subdirectory to your PATH
environment variable.
There are many different types of command interpreters (also called shells),
we cannot possibly document all of them.
However for Bourne-style shells (the most common type)
the command might look like this:
$ export PATH=/usr/local/prince12/bin:$PATHYou will need to add the appropriate command to your shell's configuration or startup file. See your distribution or shell's documentation for how to do this.
Prince is now ready to use - to run Prince on MacOS X, enter the prince
command on the command line - for details please see the Command-line Reference.
Your First Document will walk you through generating your first PDF
document.
For the layout of a Prince installation on MacOS X, see the MacOS X installation layout section.
For information about using Prince from PHP, Java, .NET, and other server frameworks you will need to install one or more Prince wrappers. See Server Integration for installation and usage information.
Prince is installed using the terminal. The installation package can be
downloaded from the Download Page.
Then open a terminal window and change to the directory that you downloaded or
copied the installation package to.
The $ symbol represents the command prompt and the text that
follows is the command,
you should not type in the $ symbol.
$ cd download_directoryDepending on your distribution and the package that you downloaded you may be able to install Price using the tools provided by your distribution.
On Debian and Ubuntu Linux you can use gdebi
to install Prince and its dependencies.
gdebi will automatically download and install any package
dependencies,
therefore it is often easier to use gdebi than
dpkg which will not automatically install dependencies.
If you're not logged in as root (and you shouldn't be), then you can use
sudo to run the gdebi command as root.
$ sudo gdebi prince_package_debian_amd64.deb
Reading package lists... Done
Building dependency tree
Reading state information... Done
Building data structures... Done
Building data structures... Done

formatter for converting XML and HTML into PDF
 This program converts XML and HTML into PDF.
Do you want to install the software package? [y/N]:y
Selecting previously unselected package prince.
(Reading database ... 319168 files and directories currently installed.)
Preparing to unpack prince_package_debian_amd64.deb ...
Unpacking prince ...
Setting up prince ...
Processing triggers for man-db ...
If gdebi is not already installed then you can install it using
aptitude as follows.
aptitude cannot be used to install Prince itself as Prince is
not available in a Debian repository.
$ sudo aptitude install gdebi
On RPM based systems, such as CentOS or Redhat Enterprise Linux,
you should use the yum tool to install Prince.
If you're not logged in as root (and you shouldn't be), then you can use
sudo to run the yum command as root.
$ sudo yum install prince-package.centos.x86_64.rpm
We have not shown all of yum's output here as there is a lot of
it.
The process should prompt you before installation, which will look
similar to:
================================================================================
 Package        Arch    Version            Repository                      Size
================================================================================
Installing:
 prince         x86_64  version            /prince-package.centos.x86_64   13 M
Installing for dependencies:
 fontconfig     x86_64  2.8.0-5.el6        base                           186 k
 giflib         x86_64  4.1.6-3.1.el6      base                            37 k
 libSM          x86_64  1.2.1-2.el6        base                            37 k
 libX11         x86_64  1.6.0-2.2.el6      base                           586 k
 libX11-common  noarch  1.6.0-2.2.el6      base                           192 k
 libjpeg-turbo  x86_64  1.2.1-3.el6_5      base                           174 k
 libtiff        x86_64  3.9.4-10.el6_5     base                           343 k

Transaction Summary
================================================================================
Install       8 Package(s)

Total size: 15 M
Total download size: 1.5 M
Installed size: 18 M
Is this ok [y/N]: y
Downloading Packages:
The process will then end with messages similar to:
Installed:
  prince.x86_64 0:version

Dependency Installed:
  fontconfig.x86_64 0:2.8.0-5.el6        giflib.x86_64 0:4.1.6-3.1.el6
  libSM.x86_64 0:1.2.1-2.el6             libX11.x86_64 0:1.6.0-2.2.el6
  libX11-common.noarch 0:1.6.0-2.2.el6   libjpeg-turbo.x86_64 0:1.2.1-3.el6_5
  libtiff.x86_64 0:3.9.4-10.el6_5

Complete!
Prince is now ready to use. Your First Document will walk you through generating your first PDF document.
For information about using Prince from PHP, Java, .NET, and other server frameworks you will need to install one or more Prince wrappers. See Server Integration for installation and usage information.
Prince can be installed on Alpine Linux and FreeBSD from a tarball (a
.tar.gz file). The tarball packages can also
be used on Linux when there is no .deb or
.rpm package for your system or the package for
your system didn't work for some reason. In these cases this section
contains the relevant installation instructions.
Start by choosing the tarball that is the closest match for your system, take care to match operating system (Linux vs FreeBSD) and processor type (32 vs 64bit - please note that Prince supports only x86 and x86_64 processors).
The Generic Linux package should be able to run on a wider range of Linux versions than other packages.
These packages rely on some shared libraries installed on your system.
Prince is just using the system shared object loader for most libraries, so
the LD_LIBRARY_PATH environment variable might need to be
edited, if you have installed these libraries in different locations.
The bin/prince script in the installation directory (see
Linux and FreeBSD installation layout) is a wrapper script that calls the executable,
and should be a suitable place to set or modify the LD_LIBRARY_PATH
variable in order to configure where the loader should look for shared
libraries.
To install Prince from a tarball enter these commands.
$ tar xzf prince-package-freebsd-amd64.tar.gz
Start by unpacking the package. Note that the package name may be different than the example shown here. This will create a new directory containing the Prince files.
Change into the new directory unpacked by the package. As before, the directory name may be different from the one in this example.
Run the install.sh script.
If you want to install Prince for multiple users you may need to
execute this command with sudo as shown here.
sudo will execute the given command with `root'
(administrator) privileges.
It may prompt you for your password (your user account's password)
before executing the command.
If you're installing Prince for only one user you can omit
sudo from this command.
The script will prompt you for the installation directory.
You can press enter to accept the default
(/usr/local)
or type in your preferred directory.
In this example the user has accepted the default by pressing
ENTER without entering anything.
If you're installing Prince for only one user (and not using
sudo you will need to choose a directory that you have
write access to.
If you chose a non-standard location you may need to add the
bin/ subdirectory to your PATH
environment variable.
There are many different types of command interpreters (also called shells),
we cannot possibly document all of them.
However for borne-style shells (the most common type)
the command might look like this:
export PATH=/usr/local/prince10/bin:$PATH
You will need to add the appropriate command to your shell's configuration or startup file. See your operating system's or shell's documentation for how to do this.
Prince is now ready to use. Your First Document will walk you through generating your first PDF document.
For information about using Prince from PHP, Java, .NET, and other server frameworks you will need to install one or more Prince wrappers. See Server Integration for installation and usage information.
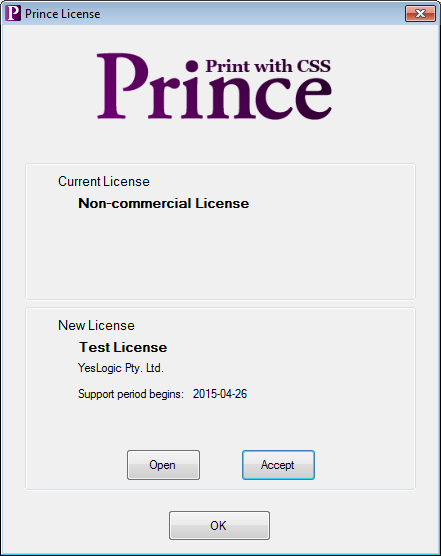
If you've purchased Prince you can install your license file (which you will receive via e-mail) to remove the watermark on generated documents. This section will explain how to install the license file. If instead you're using the free version of Prince then you don't need to install a license file.
On Windows you can install a license by following these steps:
Open the license window by clicking the License icon in the main window.
Click the open button and choose your license file.
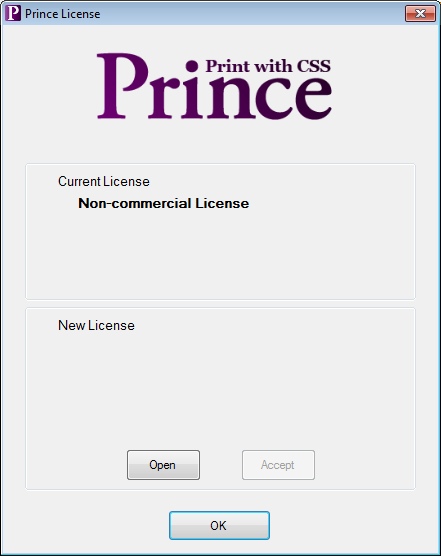
The license should be displayed in the lower part of the window, click the accept button to install it then click Ok.
On other systems copy the license.dat file
into the lib/prince/license
directory of the Prince installation (see Installation Layout).
For example, if Prince was installed into the default
/usr/local directory,
the license file should be copied to
/usr/local/lib/prince/license/license.dat
$ cp license.dat /usr/local/lib/prince/license/license.dat
$ prince --version
Prince 10 rev 3
Copyright 2002-2015 YesLogic Pty. Ltd.
Test License
Remember to backup your license file in case you want to reinstall Prince in the future.
This section details where Prince installs its files in the various supported operating systems.
Prince installs its files to %ProgramFiles% on 32-bit Windows, and to
%ProgramFiles(x86)% on 64-bit Windows.
prince-gui.exe is the Prince GUIengine contains all resource filesOn 64-bit Windows, the Prince GUI is a 32-bit program, but the formatting engine is 64-bit.
In the subfolder engine are all resource files:
| Folder | Function |
|---|---|
bin |
The Prince core (prince.exe) |
contrib |
Licenses for open source libraries used by Prince |
dict |
LibThai dictionary, used by Prince to handle word breaking in the Thai language |
dtd |
Document Type Definitions (DTDs) for XML languages understood by Prince |
etc |
The CA certificate bundle used for retrieving documents over HTTPS |
hyph |
The hyphenation dictionaries for common languages |
icc |
ICC color profiles |
lib |
Shared libraries required by Prince |
license |
The Prince license file |
math |
MathML resource files |
style |
The default CSS style sheets |
Prince installs its files by default to /usr/local on MacOS X:
/usr/local/bin/prince is the shell script/usr/local/lib/prince/ contains all resource filesIn the resource directory are all resource files:
| Folder | Function |
|---|---|
bin |
The Prince core (the prince binary executable) and
(as of Prince 11.3) the princedebug script |
dict |
LibThai dictionary, used by Prince to handle word breaking in the Thai language |
dtd |
Document Type Definitions (DTDs) for XML languages understood by Prince |
etc |
The CA certificate bundle used for retrieving documents over HTTPS |
hyph |
The hyphenation dictionaries for common languages |
icc |
ICC color profiles |
lib |
Shared libraries required by Prince |
license |
The Prince license file |
math |
MathML resource files |
style |
The default CSS style sheets |
Prince installs its files by default to /usr on Linux and FreeBSD:
/usr/bin/prince is the shell script/usr/lib/prince/ contains all resource filesIn the resource directory are all resource files:
| Folder | Function |
|---|---|
bin |
The Prince core (the prince binary executable) and
(as of Prince 11.3) the princedebug script |
dict |
LibThai dictionary, used by Prince to handle word breaking in the Thai language |
dtd |
Document Type Definitions (DTDs) for XML languages understood by Prince |
etc |
The CA certificate bundle used for retrieving documents over HTTPS |
hyph |
The hyphenation dictionaries for common languages |
icc |
ICC color profiles |
lib |
Shared libraries required by Prince |
license |
The Prince license file |
math |
MathML resource files |
style |
The default CSS style sheets |
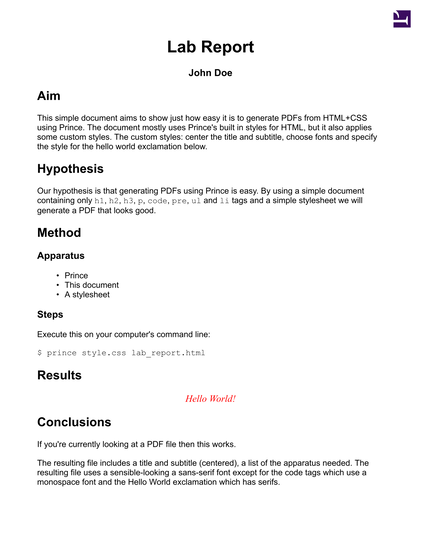
In this section we will process a very simple document. We've chosen a document that fits HTML's heading and paragraph structure naturally: a lab report. The lab report will have a title, an author and date, several headings (Aim, Hypothesis, Method, Results and Conclusion). It does not include a table of results, graphics or diagrams: it is a very simple lab report.
The report itself is very basic, the HTML source is shown below.
You can save the HTML to a file named
<!DOCTYPE html>
<html lang="en">
<head>
<title>Lab Report</title>
</head>
<body>

<h1>Lab Report</h1>
<h2 class="subtitle">John Doe</h2>

<h2>Aim</h2>

<p>
This simple document aims to show just how easy it is to generate PDFs from
HTML+CSS using Prince.  The document mostly uses Prince's built in styles
for HTML, but it also applies some custom styles.  The custom styles: center
the title and subtitle, choose fonts and specify the style for the hello
world exclamation below.
</p>

<h2>Hypothesis</h2>

<p>
Our hypothesis is that generating PDFs using Prince is easy.
By using a simple document containing only
<code>h1</code>,
<code>h2</code>,
<code>h3</code>,
<code>p</code>,
<code>code</code>,
<code>pre</code>,
<code>ul</code> and
<code>li</code>
tags and a simple stylesheet we will generate a PDF that looks good.
</p>

<h2>Method</h2>
<h3>Apparatus</h3>

<ul>
  <li>Prince</li>
  <li>This document</li>
  <li>A stylesheet</li>
</ul>

<h3>Steps</h3>

Execute this on your computer's command line:

<code><pre>
$ prince style.css lab_report.html
</pre></code>

<h2>Results</h2>

<p id="hello">Hello World!</p>

<h2>Conclusions</h2>

<p>
If you're currently looking at a PDF file then this works.
</p>

<p>
The resulting file includes a title and subtitle (centered), a list of the
apparatus needed.  The resulting file uses a sensible-looking a sans-serif
font except for the code tags which use a monospace font and the Hello World
exclamation which has serifs.
</p>

</body>
</html>
The report is written using very familiar HTML5 tags.
Headings (h1, h2 and
h3), paragraphs (p) and
lists (ul, li) are used for
the report's structure,
the code tag is used to identify code and
pre is used to identify pre-formatted text.
All user agents, including Prince, associate default styles with all of these tags. Without any explicit styles Prince will format this document in a reasonable and familiar way, similar to most web browsers. The major difference between Prince and a web browser is that Prince needs to create discrete pages, a web browser will format the document as a continuous flow. See Paged Media for more information.
Process the document using the command line
prince command:
$ prince lab_report.html
This will create a lab_report.pdf
file in the current directory.
If it did not, the Troubleshooting section may be useful.
When you open the document in a PDF viewer you should see something like
Unstyled lab report.
Prince has applied a default stylesheet to the document.
A different default stylesheet is used depending upon the document's type
(HTML or Docbook XML) see XML Input.
The default stylesheet may be overridden by other stylesheets, more on that
in Applying Style Sheets in Prince.
Prince's command line interface supports many options
(see Command-line Reference) and can be called from scripts and other
software.
However some users may not be comfortable with the command line interface.
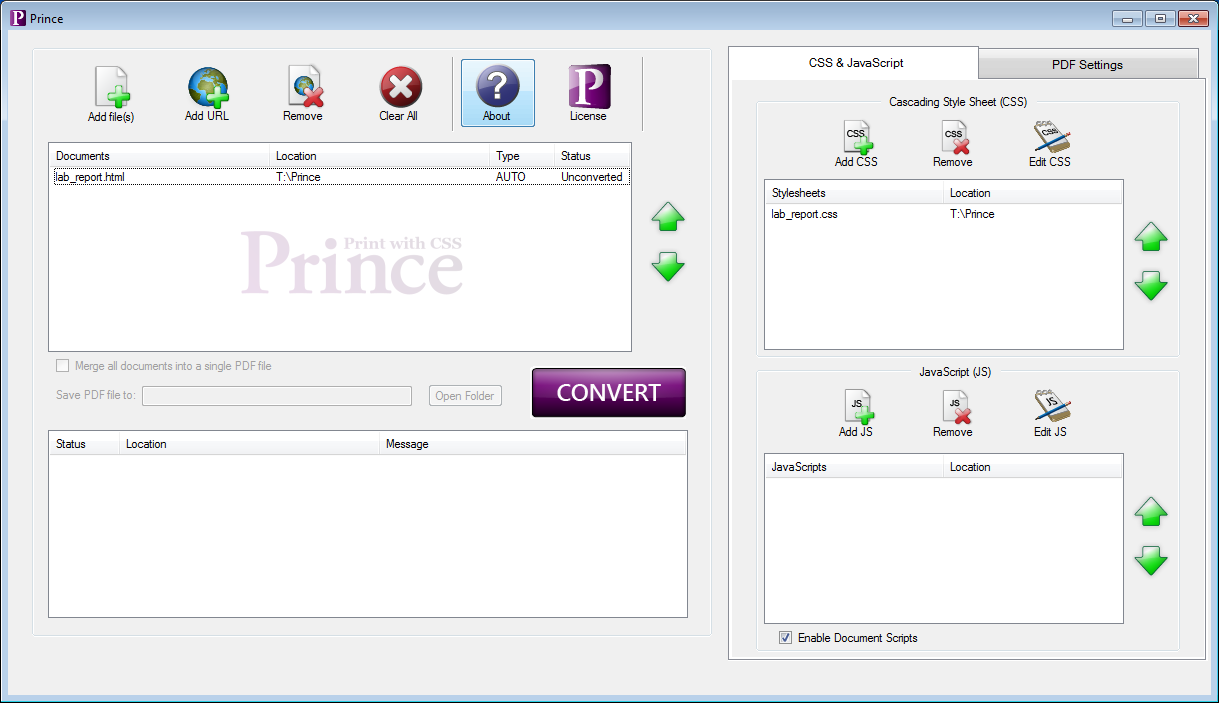
On Windows,
Prince provides a more familiar GUI interface, which can be started by
choosing Prince from the start menu.
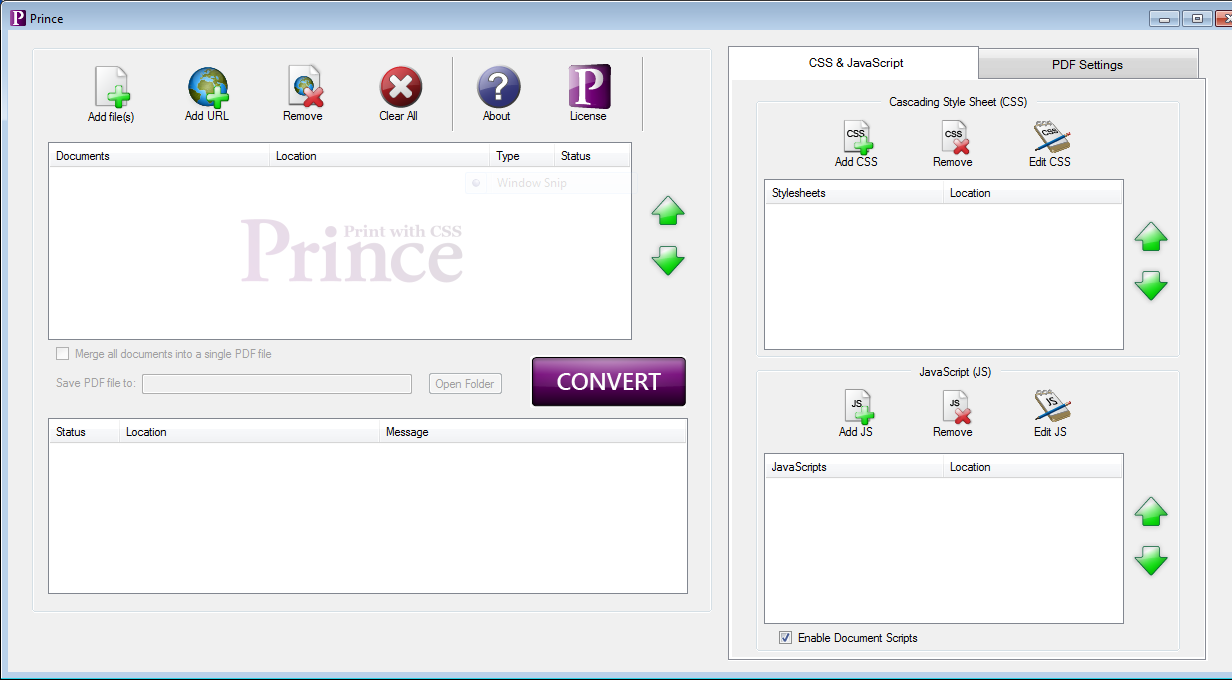
Prince GUI shows the Prince GUI,
click "Add File(s)" to choose your HTML file
(lab_report.html)
then click the large "Convert" button to convert it.
Prince will generate a PDF file and place it in the directory with your HTML
file.
We can now make the report look better by adding our own styles. It is good practice to keep style information separate from the document itself. This makes it easy to modify or replace the styles later. The style information is kept in one or more Cascading Style Sheets (CSS) files.
Let's start by creating and opening a new file named
lab_report.css,
First we can specify a sans-serif font for the document:
body {
    font-family: sans-serif;
}
The default is a font with serifs, a sans-serif font is easier to read on a
computer screen while a serif font is easier to read when printed out.
See Text formatting and the font-family
property.
Next, let's center the title and subtitle and decrease the font size of the subtitle:
h1, h2.subtitle {
    text-align: center;
}

h2.subtitle {
    font-size: 14pt;
}
Note that we use the .class
syntax to style only the subtitle,
which is a h2 with the subtitle class,
without affecting the other h2 elements in the
document. See the section on CSS Selectors for more
information.
Information about alignment (such as centered text) can be found in the
Paragraph formatting section.
Finally we will make the "Hello World!" paragraph stand out.
This paragraph is identified by an id attribute so we can use
the #id syntax in the CSS
selector.
#hello {
    color: red;
    text-align: center;
    font-size: large;
    font-style: italic;
    font-family: serif;
}
Okay, that's getting unnecessary,
however we can see just how easy it is to apply styles to our document.
You can download the complete CSS file here:
lab_report.css.
There are many ways to apply a stylesheet to a document, for this tutorial we will show only three. For information about the ways that styles can be applied and style precedence see Applying Style Sheets in Prince.
-s command line option:$ prince -s lab_report.css lab_report.htmlPress the "Add CSS" button on the right of the Prince GUI and choose your CSS file (Prince GUI). You will need to click "Convert" again for these changes to take effect.
link tag.
Place the tag within the head tag of the
document. For example:
<!DOCTYPE html>
<html>
<head>
<title>Lab Report</title>
<link rel="stylesheet" href="lab_report.css" />
</head>
<body>
...
You will need to re-run Prince for these changes to take effect.
After applying the style as above, Prince should generate something similar
to Styled lab report.
You can download the generated PDF file here:
lab_report-styled.pdf.
This sample document and many others are available in our samples repository. You are encouraged to use samples from the repository and contribute your own.
You are now ready to proceed to the User Guide to learn about all the features - and to make the best out of Prince!
The Prince Installation Guide tries to be exhaustive in explaining how to install the application. However, there might always be something not answered in the documentation, or something not working as expected. There are a couple of ways to get help to solve the problems:
We work hard to make Prince work on multiple platforms (Windows, Linux, etc) and with multiple configurations. However things don't always work correctly the first time. You're very welcome to contact us for support or visit our forum. However if you are facing a common problem, you may be able to find an explanation and solution below.
prince: page 1: warning: no font for
      Aegean Numbers character U+10123,
      fallback to '?'
Prince tries to tell you which page the missing glyph appeared on, what type of character it was (eg. "Latin", "Greek", etc.) and what character it used as a fallback (usually '?').
prince: internal error: no available fonts
However, if there are no available fonts on the system at all then it won't even be able to find the question mark glyph, and you get an internal error message.
Install the msttcorefonts package (see your operating system's documentation).
Redefine the CSS generic font families to use different TrueType
fonts by editing the
fonts.css file in the Prince
installation - see Installation Layout,
Fonts and Redefining the generic font families.
This problem may be a symptom of the Fontconfig.
Fontconfig error: Cannot load default config file
Prince uses the Fontconfig library on Linux systems to search for fonts. Fontconfig is installed as a standard component on most desktop Linux distributions such as Ubuntu and recent versions of Red Hat Linux.
Some older Linux distributions do not come with fontconfig and this may cause the above error. This error will usually be followed by errors relating to Missing glyphs or fonts that cannot be found due to the absence of Fontconfig.
install Fontconfig (see your operating system's documentation).
Redefine the CSS generic font families to use TrueType fonts that are
specified directly by their filenames, avoiding the need to use
Fontconfig at all. In extreme cases it might be advisable to disable
system fonts completely with the
--no-system-fonts
command-line option.
See Fonts and Redefining the generic font families.
/usr/local/stow/prince-9/lib/prince/bin/prince: error while loading shared
libraries: libtiff.so.4: cannot open shared object file: No such file or
directory
Shared object "libxml2.so.2" not found, required by "prince"
Prince uses some third-party shared libraries, these are used for things such as decoding TIFF, PNG or JPEG files and finding and loading fonts. If one or more of these shared libraries cannot be found on your system then Prince will not run. This can occur if Prince was installed from a tarball (see Tarballs - Alpine Linux, FreeBSD and Generic Linux).
Install the missing library software. Acknowledgments provides a list of the libraries that Prince uses. It is recommended to install them through your operating system's package management tool, see your operating system's documentation for more information.
Prince is just using the system shared object loader for most
libraries, so the LD_LIBRARY_PATH environment variable might
need to be edited, if you have installed these libraries in non-standard
or different locations.
PATH issues
-bash: prince: command not found
The command interpreter (bash) does not
know how to find the prince executable.
It was not found in any of the locations specified by the
PATH environment variable.
Add Prince's bin/ subdirectory to your
PATH and ensure that these changes are saved for future
shell sessions.
If Prince is installed in /opt/prince10,
then add /opt/prince10/bin to
PATH.
There are many different types of command interpreters (also called
shells) and we cannot possibly document all of them.
The appropriate command for borne-style shells (the most common type)
is usually:
export PATH=/opt/prince10 /bin:$PATH
This should be added to your command interpreter's configuration. For more information see your operating system's documentation.
Why does Prince on 64-bit Windows install into the
32-bit compatibility directory %ProgramFiles(x86)%?
The Prince GUI is still a 32-bit program, but the formatting engine is 64-bit.
On Linux, you typically run Prince with the following command:
prince file.xml -o file.pdf
On Windows, you replace the name of the executable with
Prince\engine\bin\prince.exe in the installation directory
(see Windows installation layout), which is the command-line program.
See also Command-line Reference.
"C:\Program Files (x86)\Prince\engine\bin\prince.exe" file.xml -o file.pdf
Can I install Prince on cloud services or containers (Azure, AWS, Docker)?
Prince can be installed on the supported operating systems - also when they are running in cloud or container services. On Linux, some environments might not provide for all dependencies - you can address this by either trying to install the Generic Linux Prince package (see Tarballs - Alpine Linux, FreeBSD and Generic Linux), or by trying to install the missing dependencies.
See this forum post for a description of an installation on Azure.
Prince for Books is available in package bundles only - to install
it, the files need to be copied into place (Windows), or an installation
script needs to be run (on Linux and MacOS X). It can be installed without
problem alongside a normal Prince installation - the executable to run is
called prince-books.
The Prince Wrappers come in different languages, and each one has a different installation procedure. Mostly they are explained in the documentation for each of the Prince Wrappers. The short principle is that the wrapper files need to be placed in a location from which they can run - this may slightly vary depending on the hosting Operating System.